Week 6 Newsletter: July 21st
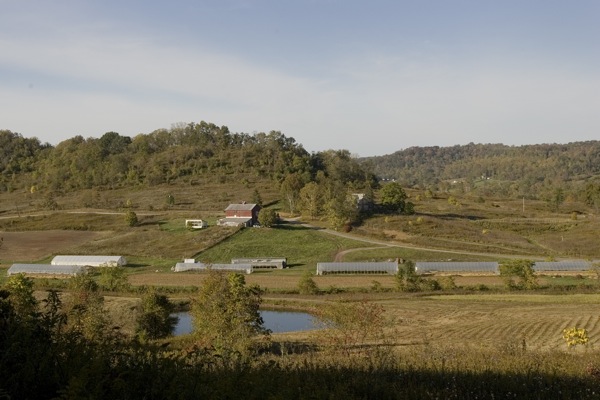
As you might imagine, with the Open Farm Day looming this weekend, we are all scampering to find the time to do the little extra things to prepare for your visit. Between harvesting and packing the orders, planting, and weeding, general ‘tidying-up’ has transformed the farm. It is looking better every day. You will be receiving (if you haven’t already), an e-vite from us about the Farm Day. Please take a moment to respond, so we can plan for the number of people attending. Thanks so much.
Again this week, THE EXTRAS BOX will be at each site. This is an opportunity for you to share something you may not want for a little more of the extra item. Remember the others who haven’t yet picked up, and everybody wins. YEAH!!! This week you will find Sweet Basil. Last week, we explained about the two failed salad mix plantings that have left a hole in the salad rotations. With that in mind, we are once again very grateful to have the extras box this early in the season. For the Half-share Combo members, this is your 1st delivery of the amazing fruit from Neil Cherry’s orchard. We hope you will be pleased. If you did not order a Combo Share, please be sure to inform all those who may help with your pickups to check the list at the host site each week. That list will tell each person exactly what he or she should be picking up. With all of the choices, everybody really has to pay attention to the lists that Rob painstakingly prepares each week. Thanks so much.
As for field work, more of the winter squashes are mulched each day. It is hot and sweaty work that is not made any easier by the recent rains. The Long Beans continue their climb on the trellises, while the bush beans are beginning to fruit. Peppers, eggplants, beets and more are on the brink of explosion! But you can see all of this for yourself this Sunday! So do come down and visit this cornucopia of your veggies, meet the folks who grow and deliver them. We can’t wait to see and meet you!
From all of us at Green Edge,
Becky (Kip, Dan, John, Cale, Rob, Julia, Penny, Guinevere, Morgan, Martin, Geoff, and Maria
THIS WEEK’S VEGGIES
Sunflower Microgreens - If you’re not familiar with micro-greens, you are in for a surprise! Unlike sprouts (which are only grown in water), these are grown in soil and therefore im-part the nutritional additions from the soil. These have a mild, almost nutty flavor and are juicy and crunchy.
Mushrooms - This week’s mush-rooms are either shiitake or any of the oyster mushrooms (yellow, white, brown, or blue) that we grow.
Sweet Basil – The official start of summer for us is pesto, and we’ve been enjoying it for several weeks now! We hope you will too! You may also see packages of this in both Columbus Whole Foods. (Look for the Green Edge logo.)
SUMMER SQUASH – The varie-ties of squash we grow: Patty Pan, Sunburst, Yellow Squash, and Zuc-chini. Sauté, steam or grill - another great ingredient for vege-table shish kabobs. Notes on page 2.
TOMATOES!! - Yes to summer!! This week’s varieties include paste tomatoes called Bellstar, and var-ious ‘slicer’ tomatoes we grow. Heirlooms are not far behind.
Swiss Chard – We are thrilled to have the chard back. These mildly-flavored and tender leaves are perfect for chopping into any number of dishes, hot or cold. Separate the stems and leaves, blanch and go….!
Yellow Onions - This time each year we like to bring you some onions from another certified or-ganic grower down here. Our soil is not good for growing onions, but we wanted you to have some that are locally grown. Taste the difference!
STORING TOMATOES – We attempt to ship you tomatoes that are not dead ripe the day your receive them. Store them shoulder side (stem end) down, and blossom end up.
Get the most out of your tomatoes. Tomatoes are a warm loving fruit. Do not store them in the refrigerator unless you will be using them very soon.
SUMMER SQUASH: We grow a tasty medley of summer squashes that thrive in the heat of the season. Our zucchini, yellow & pattypan varieties can be enjoyed raw, but also do well grilled whole alongside your favorite meat, fish or other veggies. Marinated or not, their flavor suits any barbeque or picnic. If you find that you prefer to cook them on the stovetop, try adding them to a pasta dish, pizza, stir-fry, or curry. Store them on your countertop if you anticipate eating them right away, or in the crisper drawer of your fridge if you want to save them for later in the week. They should keep this way for least a week if not more.
The Combo Corner
This week’s bread from The Village Bakery and Café is Italian Herb Garden - It is a lighter whole wheat and white with olive oil, rosemary, basil and fennel.
The cheese share from Integration Acres this week includes White Goat Cheddar and Chevre’.
PICKUP CONTACT NUMBERS & HOURS
NEW ALBANY – 614-216-9370 3-10pm
TIBET – 614-784-8124 11am-6pm
BEXLEY MARKET-614-252-3951 3-8pm
UPPER ARLINGTON- 614-284-1188 2- 6pm
CLINTONVILLE COOP – 614-261-3663 11 am-8 pm
PLATES STUDIO –DUBLIN - 614-336-9502 4-8 pm
HYACINTH BEAN – 740-594-9302 12-6pm
Please remember to call your host first if problems arise. Since they are closer to you, they can usually resolve the problem. Feel free to call us if the host is unable to help you – 740-448-4021 Thanks!
The GREEN BAGS and WAX BOXES provided by us for you to carry your veggies is actually on loan to you for the season. We have two per mem-ber, so please return your GREEN BAG and BOX each week that you pick up. We are happy to support the goal for allto use fewer resources. But you need to help by joining with us in the effort to keep the GREEN BAGS and BOX in the recycling loop. Thanks so much!
Recipe: Spanish Tortilla Serves 2-4.
Ingredients:
6 eggs, beaten 2 Yukon Gold potatoes 2-3 green onions (or ¼ cup chopped yellow onion), chopped up to the light green 1/4 cup olive oil Salt
Method:
1.) Slice the potatoes (peeled or unpeeled) into disks between ¼ and 1/8” wide.
2.) Pour the olive oil into a cast-iron or hard anodized aluminum pan (a pan that will be able to take the heat of a broiler in the oven) and heat it over medium-high heat. When it is hot enough to sizzle the potatoes as soon as they hit the oil – start frying them in one layer. Working in batches, fry them until they are lightly browned, not crispy. When they are done, let the potatoes dry on a paper towel & salt them well. Keep frying until they are all cooked.
3.) When the potatoes are all done, pour off most of the oil and sauté the onions. When they are just starting to crisp, turn off the heat. Arrange the onions so they are evenly covering the bottom of the pan. Layer the potato on the pan in a scalloped pattern.
4.) Turn the heat back on - to medium, and pour in the eggs. Add a generous pinch of salt. Shake the pan to get the eggs to coat everything in the pan. Let this cook until you see the edges of the tortilla begin to set, then put the pan under the broiler.
5.) Cook it under the broiler for 5 minutes or until the top browns. Remove the pan and set it to cool for at least 5 minutes. Cut into wedges and serve. It’s also good at room temperature, and will keep a couple days in the fridge. (from simplyrecipes.com)
Caramelizing Onions - Caramelizing onions, by slowly cooking them in a little olive oil until they are richly browned, is a wonderful way to pull flavor out of the simplest of ingredients. Onions are naturally sweet; and as caramel comes from the simple cooking of sugar, when you slowly cook onions over an extended period of time, the natural sugars in the onions caramelize, making the result intensely and wonderfully flavorful. You can use onions prepared this way on top of steak, or for onion soup, tarts, pizza, or onion dip. 1.) Slice off the root and top ends of the onions & peel them. Cut the onions in half. Lay them cut side down and slice the onions lengthwise to desired thickness. 2.) Use a wide, thick-bottomed sauté pan for maximum pan contact with the onions. Coat the bottom of the pan with olive oil, or a mixture of olive oil and butter (about 1 teaspoon per onion). Heat the pan on medium high heat until the oil is shimmering. Add the onion slices and stir to coat the onions with the oil. Spread the onions out evenly over the pan and let cook, stirring occasionally. After 10 minutes, sprinkle some salt over the onions, and if you want, you can add some some sugar to help with the caramelization process. 3.) Let cook for 30 minutes to an hour more, stirring every few minutes. As soon as the onions start sticking to the pan, let them stick a little and brown, but then stir them before they burn. The trick is to let them alone enough to brown (if you stir them too often, they won't brown), but not so long so that they burn. After the first 20 to 30 minutes, you may want to lower the stove temperature a little, and add a little more oil, if you find the onions are verging on burning. A metal spatula will help you scrape up the browned bits from the bottom of the pan as the caramelization proceeds. As the onions cook down, you may find you need to scrape the pan every minute, instead of every few minutes. Continue to cook and scrape, cook and scrape, until the onions are a rich, browned color. At the end of the cooking process, you might want to add a little balsamic vinegar or wine to help deglaze the pan and bring some additional flavor to the onions.
Store refrigerated for several days in an air-tight container. (from simplyrecipes.com)
July 21, 2010
Subscribe to:
Post Comments (Atom)


No comments:
Post a Comment